Thanks for the other community link! I was being a bit facetious with this particular image, but I caught a few other probably-a-fly-but-lookes-like-a-bees that I'll post over the next few days.
We have a very pollinator friendly yard, so we have all kinds of flying critters. I won't limit myself to just bees and bee lookalikes though :)
Canon kept their RF mount locked down, but has been opening it up a tiny bit recently. This is a fairly new lens, so it's probably been optimized for mirrorless. If that is the case, it won't be compatible with DSLR bodies due to flang distances. You can push a DSLR optimized lens out further to mount on a MILC body. You can't move a MILC optimized lens closer to a DSLR body.
Haha, tell me why I'm on e-mount without telling me why I'm on e-mount. Canon and Sony seem to be on par for easy AF, but the back catalog of lenses on e-mount is hard to beat.
Hopefully Canon continues to let more third part glass use their mount.
[Micro review]All hail the Tamron 150-500
Pros:
- Sharp
- Nice construction
- Effective VR/OIS
- Fast and accurate AF with good tracking. I've used it for a mix of birds, bugs, and youth sports. It's never failed to disappoint
- It's not white and collapses somewhat small for a longish FF lens. I like to believe the lens didn't stand out that badly when I use it to shoot youth sports. At least I had multiple parents tell me they appreciated the photos. The hood adds a decent amount of visual mass and it's probably not needed 95% of the time
- Decent pseudo macro, but only at the wide end (1:3.1 aka 0.32x)
- 500mm is 25% more reach than 400mm and is enough for my needs. I'm on e-mount and this lens combo is faster than Sony's 100-400 with a teleconverter
- Good price to performance ratio
- The lens has a focal length lock that uses a clutch like mechanism to lock the lens at any focal length. It seems a bit gimmicky, but I find it useful
- My copy appears fairly well centered, so yay
Cons:
- Stiff zoom action and somewhat front heavy when fully zoomed. There's no manual focusing this lens when it's fully zoomed unless you're using a monopod or tripod
- It's a bit heavy, but is on par for this focal length on a FF lens. If you only need 400mm, get a 400mm lens to save some heft. I use this lens exclusively hand held, but I'm also reasonably fit. I have sat on the ground and used a knee as a makeshift monopod at times though
- Somewhat slow aperture, but this also on par for the focal length. I only use this lens outdoors, so it's never been an issue. As far as consumer lenses go, there's not much faster out there at this focal length
- If you need a long lens you're going to need something longer than 500mm. There's obviously more reach here than a 400mm lens, but it's not that much more. This isn't a real con about this lens, just know what focal length you need and go from there
- No teleconverters on e-mount
Bottom line:
- If this focal length is your jam, this could be your lens
- If you don't need the reach, get something lighter and more compact
- If you don't mind walking around with a massive lens and you're on e-mount, Sony's 200-600 zoom action is really hard to beat
Haha, the way you summarized their behavior is spot on. "Do I really have to fly here or can I keep walking?"
Ditto. I've managed to snag a few photos of birds on/near our feeder from a very close distance. The fine details are pretty amazing.
Thanks! This sub has inspired me to go bee hunting. We have a very bee friendly yard, but taking decent photos of the buggers has been proving pretty challenging. I'm making some progress, so yay!
My electric chainsaws and weed whacker always start. Eventually our lawn tractor will kick the bucket and I'll either convert it to electric or buy one.
I like this photo a lot more than the other one! I think it's the symmetry of the foliage creating a frame for the coaster.
Depending where you live, it can be really hard to find ethonal free gas. As an added bonus, carburators hate having ethonal sit in them. They'll develop a varnish. Carbs also don't like sitting partially dry and getting all the fuel out of them is a massive pain. Yay lawn equipment.
Both. Ethonal is still corrosive and the majority of fuel systems these days are compatible with E15. That said, check your owners manual.
I was really surprised how much difference even the 10mm tube made on a 35mm lens. I am not sure how far I'm going to ultimately take this because I think I want a longer focal length (yay flighty bugs) and the amount of tube needed would be a bit excessive. I had OK luck with my 150-500, which offers a minimum focal distance of around 23" and a magnification of 0.32 at the wide end. Sadly, zooming pushes the minimum focal distance out.
Like a magnifier that goes in front of the lens? I'll have to do some googling, thanks!
I do like the idea of flipping a lens around and am very tempted to give it a shot. I feel like this would work better on manual glass. Most of my mirrorless stuff is focus by wire, with the exception of an older sigma 35mm. They all have electronic apertures :(
These extensions tubes have all the electrical contacts for AF to keep working. I'm using an A9 and the AF seems unphased as long as you're under the maximum focal distance.
I'm sure blackberry and mint in the same bed would be awesome /s or maybe not /s depending on what you're into
/nocontext, lol. Browsing new? I was hoping the text in the image would give those subed here a good hint :(
Today I discovered extension tubes
I've been interested in photographing bees recently. Rather than buy a macro lens, I spent $32 on a 10mm and 16mm Meike extension tube. Photos are with an A9II + Sigma 35mm f/2, which normally offers a 0.18x magnification. All four are taken as close as the lens will focus. I'm very happy with image quality, especially given that this lens doesn't have a super flat focal plane at its minimum focal distance.
For anyone who tries an extension tube for their first time: you won't be able to focus very far in the distance (beyond about 1 foot in my case). Be ready to get up close and personal.
Our house came with a bed of Lilly of the valley and mint. Thankfully it's surrounded by cement, although both try growing in the expansion joints. It smells great at various points throughout the year but we've given up on getting rid of it. Infinite mojitos though.
https://en.m.wikipedia.org/wiki/Young's_High_Bridge for anyone looking for slightly more information.
You all inspired me to do some beautification in my veg garden
When I planned these beds I spaced them far enough apart to get my lawn tractor in-between them, but getting between them and the fence involved my weed whacker. As anyone with a fence has found out, maintaining the grass at the base of a fence is a pain.
I'm 3/4 of the way done with the edging. It's 10" tall with something like 6" or 7" of it buried. It does a good job of keeping grass out of our other beds, so I'm sure it will do a good job here. The downside is the most effective way of installing it is to trench first, put the edging in, and then refill the trench. If you try to use one of those big pizza peel looking things to make a narrow slide the will usually get wavy due to variation in trench depth.
I mowed to basically ground height between the beds, weed whacked around the beds, and put in a layer of that thick paper builders will use to protect flooring below the mulch. Some areas for cardboard instead, but we just didn't have enough cardboard to cover it all. Hopefully it will be enough to kill the grass and hopefully that results in less grass appearing in my raised beds.
How far down the path of deep seated regret do you think I'll travel in the fall?
I got tired of remaking my sisal trellice every season, and didn't like using nylon netting, so I went with something more long term. The downside? Vine removal in the fall will likely be a slog.
I made a thing! (Bluetooth speaker modeled from scratch)
No banana for scale, but let's say that it's not too big and not too small. The dimensions are 295mm tall, 270mm wide, and 240mm deep. If I had to do it again, I would be tempted to go a bit wider and touch less deep. It's probably better to be large in one of these dimensions as opposed to both of them.
Here's the top. It has a jack for charging, a connector to program the DSP, a switch to turn it on and off, and a battery gauge.
The speaker also has a built in handle that's way chunkier than it appears, but is still particle.
The big BOM pieces are a Dayton Audio LBB-5Sv2 for the BMS (battery management system), a Dayton Audio KABD-250 2 x 50W for DPS, amplification, and Bluetooth, a Peerless by Tymphany BC25SC08 tweeter, and an Italian-but-made-in-India woofer (a Coral PRF 165).
The print itself is three pieces: the bottom bit (black), the middle bit (white, blue, and white again thanks to not having enough white left to do it all in white), and the black top. Here's a CAD view that more clearly shows the three pieces:
the three pieces are held together with heat-sets and m3 bolts. There's also a tong and groove like joint to help the enclosure leak less air. I haven't noticed any evidence of air leaks while listening.
The amplifier and battery board mount to the bottom like so:
The middle was printed with some supports for the driver overhangs, but the ports and everything else were designed to print in place without supports.
This is certainly not meant to be audiophile build, but it's surprisingly decent. This isn't my first blue-tooth speaker, or even my first printed loudspeaker enclosure, but it is the first that was somewhat intentionally designed to have OK bass response while also being reasonably compact.
It measures fairly well. Frequency response, along with harmonic distortion, is pretty good. There's zero windowing or smoothing on this plot. I suspect the distortion spikes at 1 kHz, 2 kHz, etc are induced by the Bluetooth stack the board is running since they've shown up in multiple different enclosures and with multiple different drivers.
There's no nasty ringing, caused by either the drivers or the enclosure, so life is pretty good:
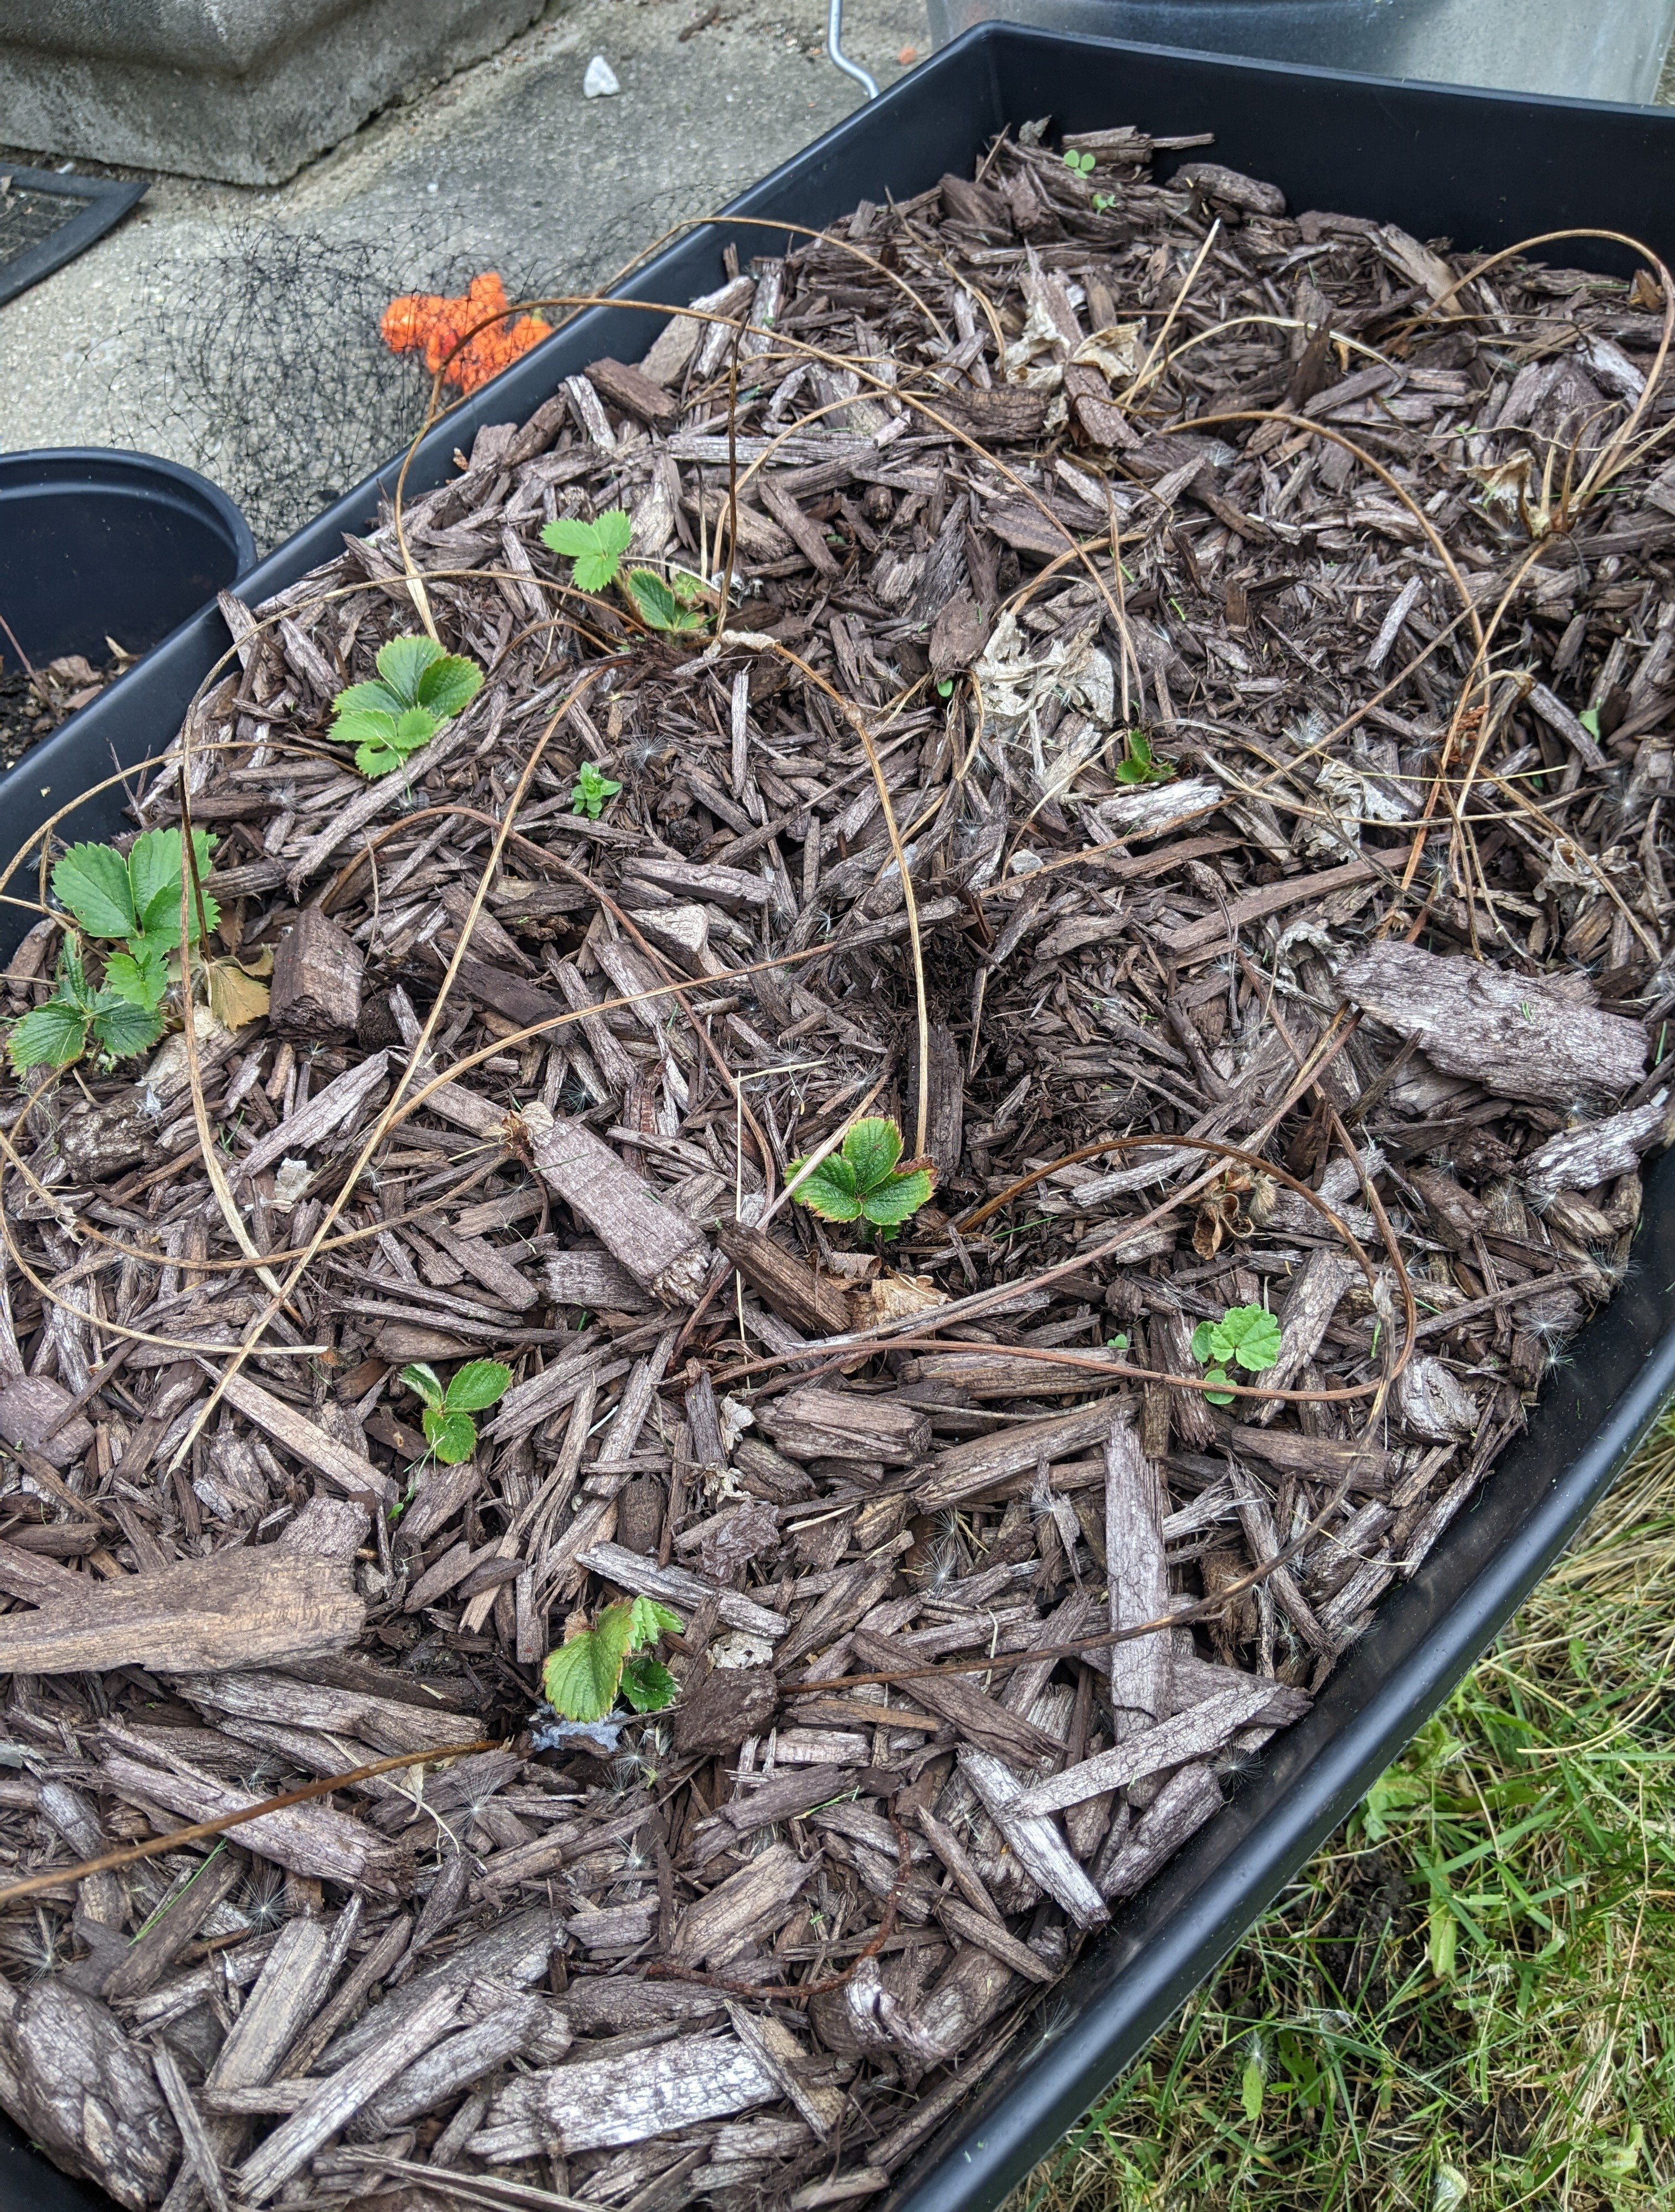
First strawberries! For those that grow them, how big is your patch?
Our kids wish we had more. I'm not sure which verity these are, but they put out tons of runners which makes me not want to put them directly in soil.
Tips for a bigger crop are welcome :)
standing desk legs
Title basically. I have a decently large solid wood desktop (guessing around 72"x30"x1") that supports two computer monitors, two studio monitors, a tower computer hanging under it, a laptop on it, and a decent amount of clutter because it's a decently sized space I spend a lot of time sitting in front of. I'm currently using Ikea IDÅSEN legs (they were a lot cheaper in early covid) and they're stable, but man are they slow to go up. They have no problem going down though, lol.
It would be nice to have an equally solid pair of legs stability wise that go up faster with some weight on them. Any suggestions?
Thanks!
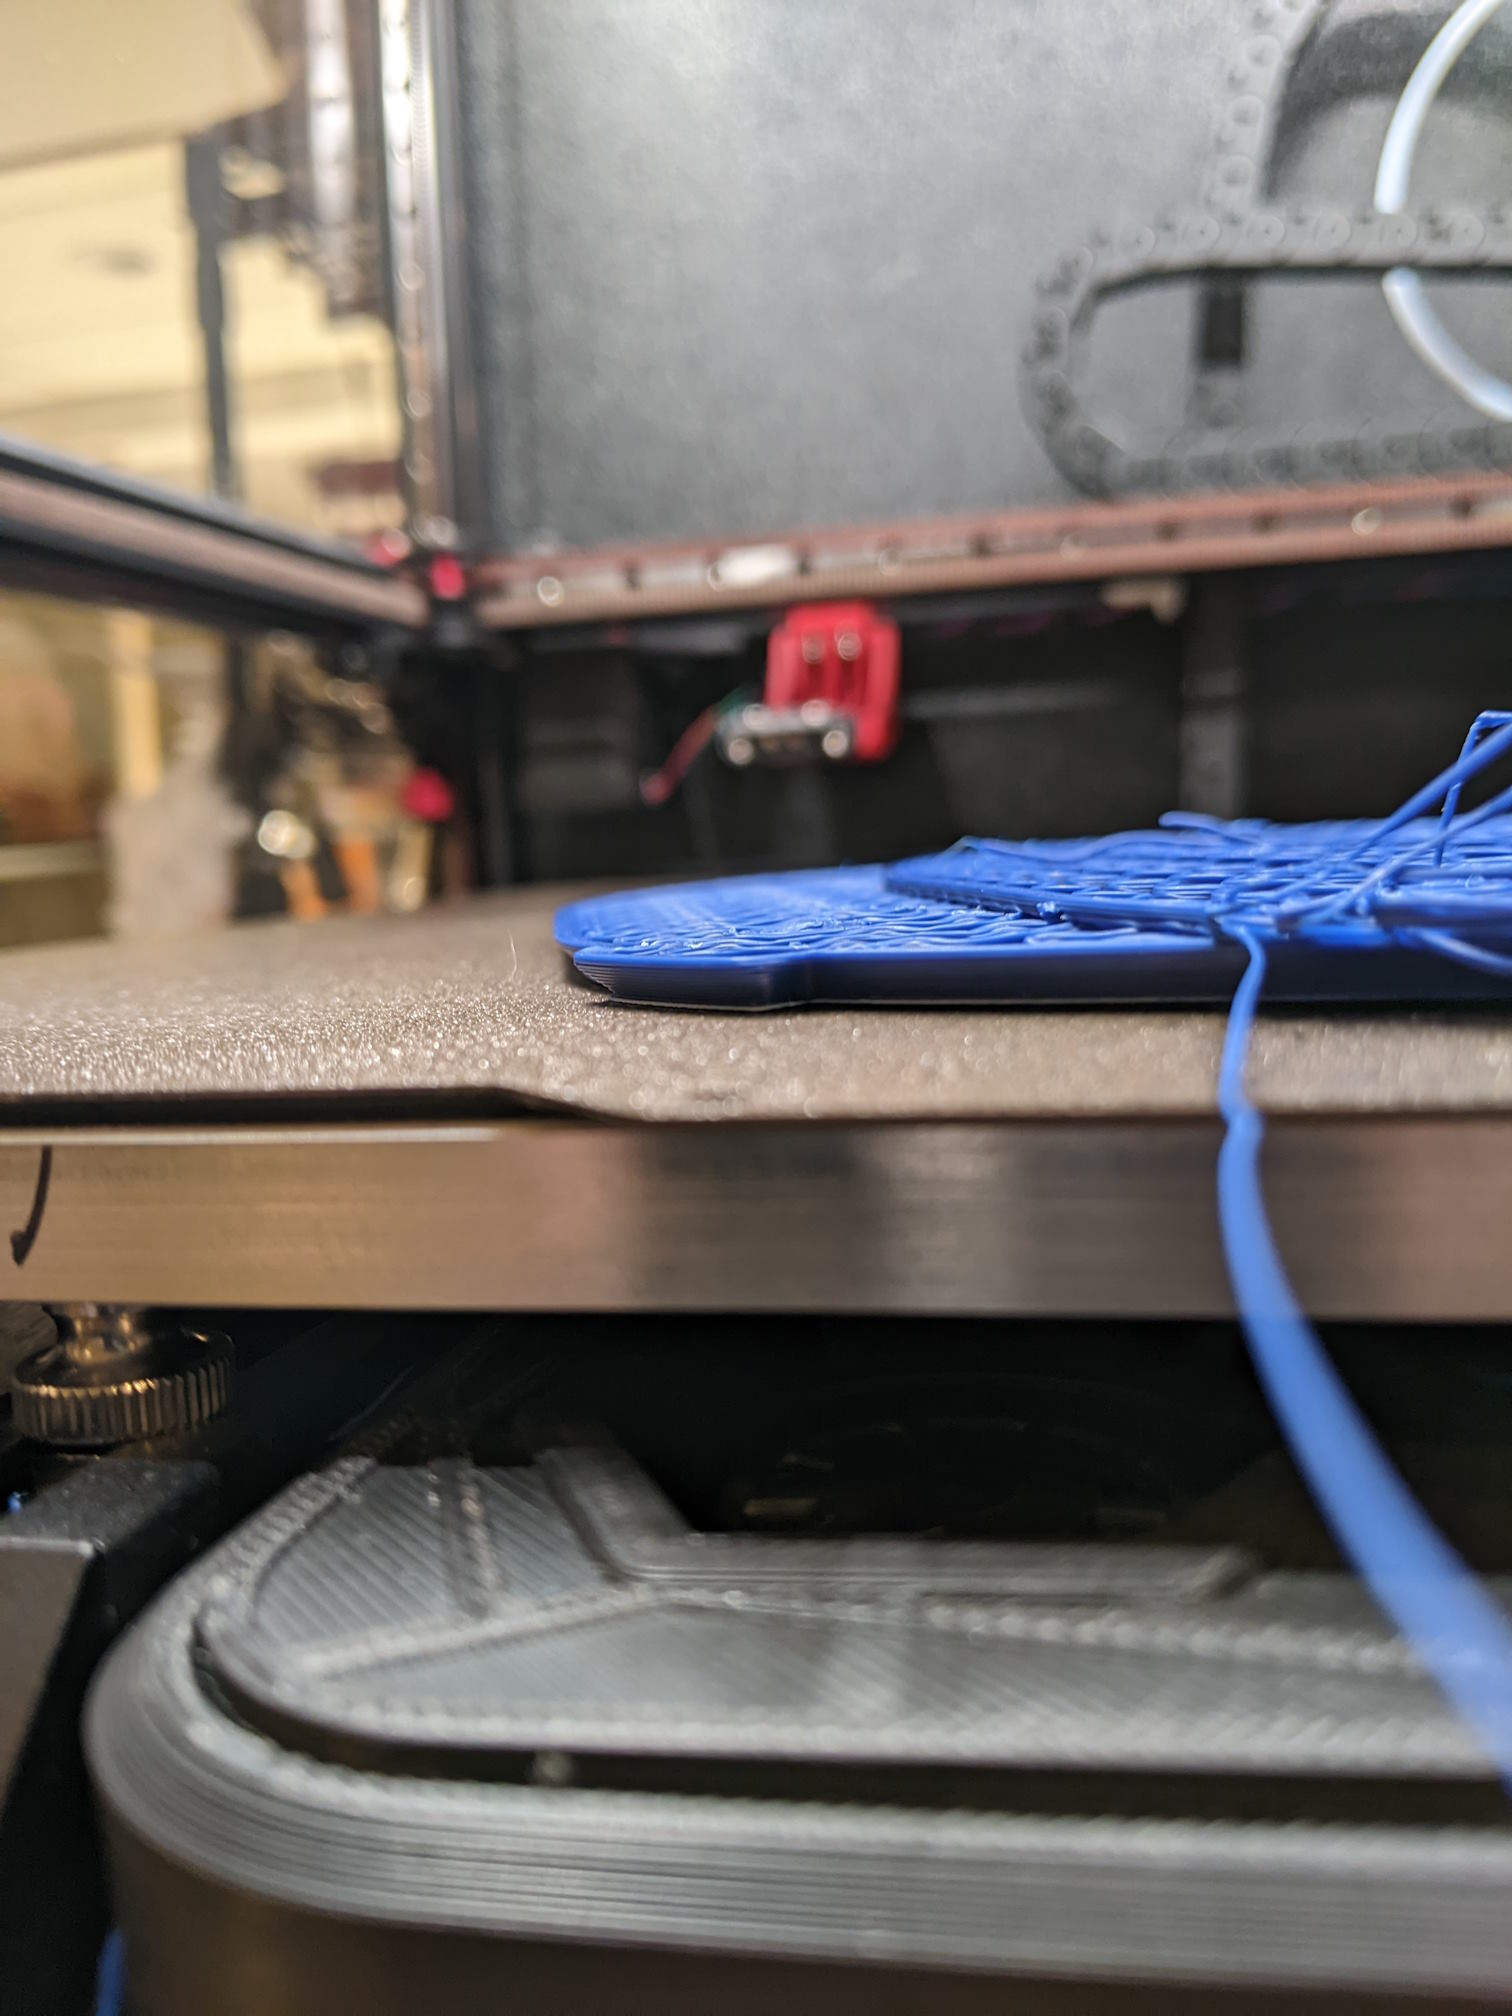
I found a way to keep my chamber temps up for long/big ASA prints
At least so far. The first go round had the nozzle crash into the tree support, resulting in a layer shift. The good news is that the print stayed very firmly stuck to the bed.
I've reset, lowered my extrusion multiplier a smidge, switched to a more traditional support pattern, and am going for it again. Wish me luck!
Any idea what happened to the second strawberry pot?
Both pots were started at the same time from the same batch of strawberry starts. They should have the same soil box. Both grew vigorously last spring/summer and got visited by deer in the fall. Both bounced back pretty well before winter set in. The left pot is very happy, the right... Not so much. I do recall the big pot having quite a bit of wilted leaf cover all winter, but don't think that was the case for the pot on the right. Maybe I didn't notice a late in the season deer visit that set the small pot back? Maybe the smaller pot got just enough colder than the big pot to kill some roots? Any other theories?
Recommended focal length for outdoor youth sports?
I think I'm going to lean into the FF E-mount world, which means giving up my D5300 + Nikon AF-S 70-300mm f/4.5-5.6 VR (115 - 450 FF equivalent). Before kids, I used this lens for motorsports/landscape/travel. Post kids we don't do a ton of that, so I've been getting along well with a pair of 35mm and 50mm primes.
My kids are pretty young and are starting to play outdoor sports like T-ball and soccer. This has brought my D5300 + 70-300 out of retirement. I'm missing the conviences of my A9, so I'm trying to figure out what lens I should get for sports duty. At this point, everything is outdoors during the middle of the day so there's no need for a fast lens. It was pretty drizzly last weekend and my current (slow lens) setup still kept ISO below 1k most of the day with a 1/640 shutter. I figure I can comfortably double ISO and halve my shutter speed on the A9 while still getting a lower noise image than I have today, so I don't think I need fast glass.
Looking through EXIF data from the previous few games on the D5300 + 70-300 it looks like I use the full range of focal lengths, but the vast majority of shots are under 400mm FF EQ and above 150mm FF EQ. I'm a little wary of wanting more reach in a few years when the kids are on bigger fields, but they'll also be bigger so maybe it will wash out. Who knows if they'll still be interested in playing either.
So what do you think?
- Third part lens that stops at 400? This means no teleconvertor in the future, but this seems like it would work well for today
- First party 100-400? Adding a 1.4 teleconvertor makes this a 140-560, but it also makes the f-stop at the long end f/8 which might not be great for sports
- 500mm? Tamron's 150-500 seems decent and doesn't call too much attention to itself, but it is heavier
- 600mm? These lenses are all fairly bit/shouty visually, but are potentially more future proof....
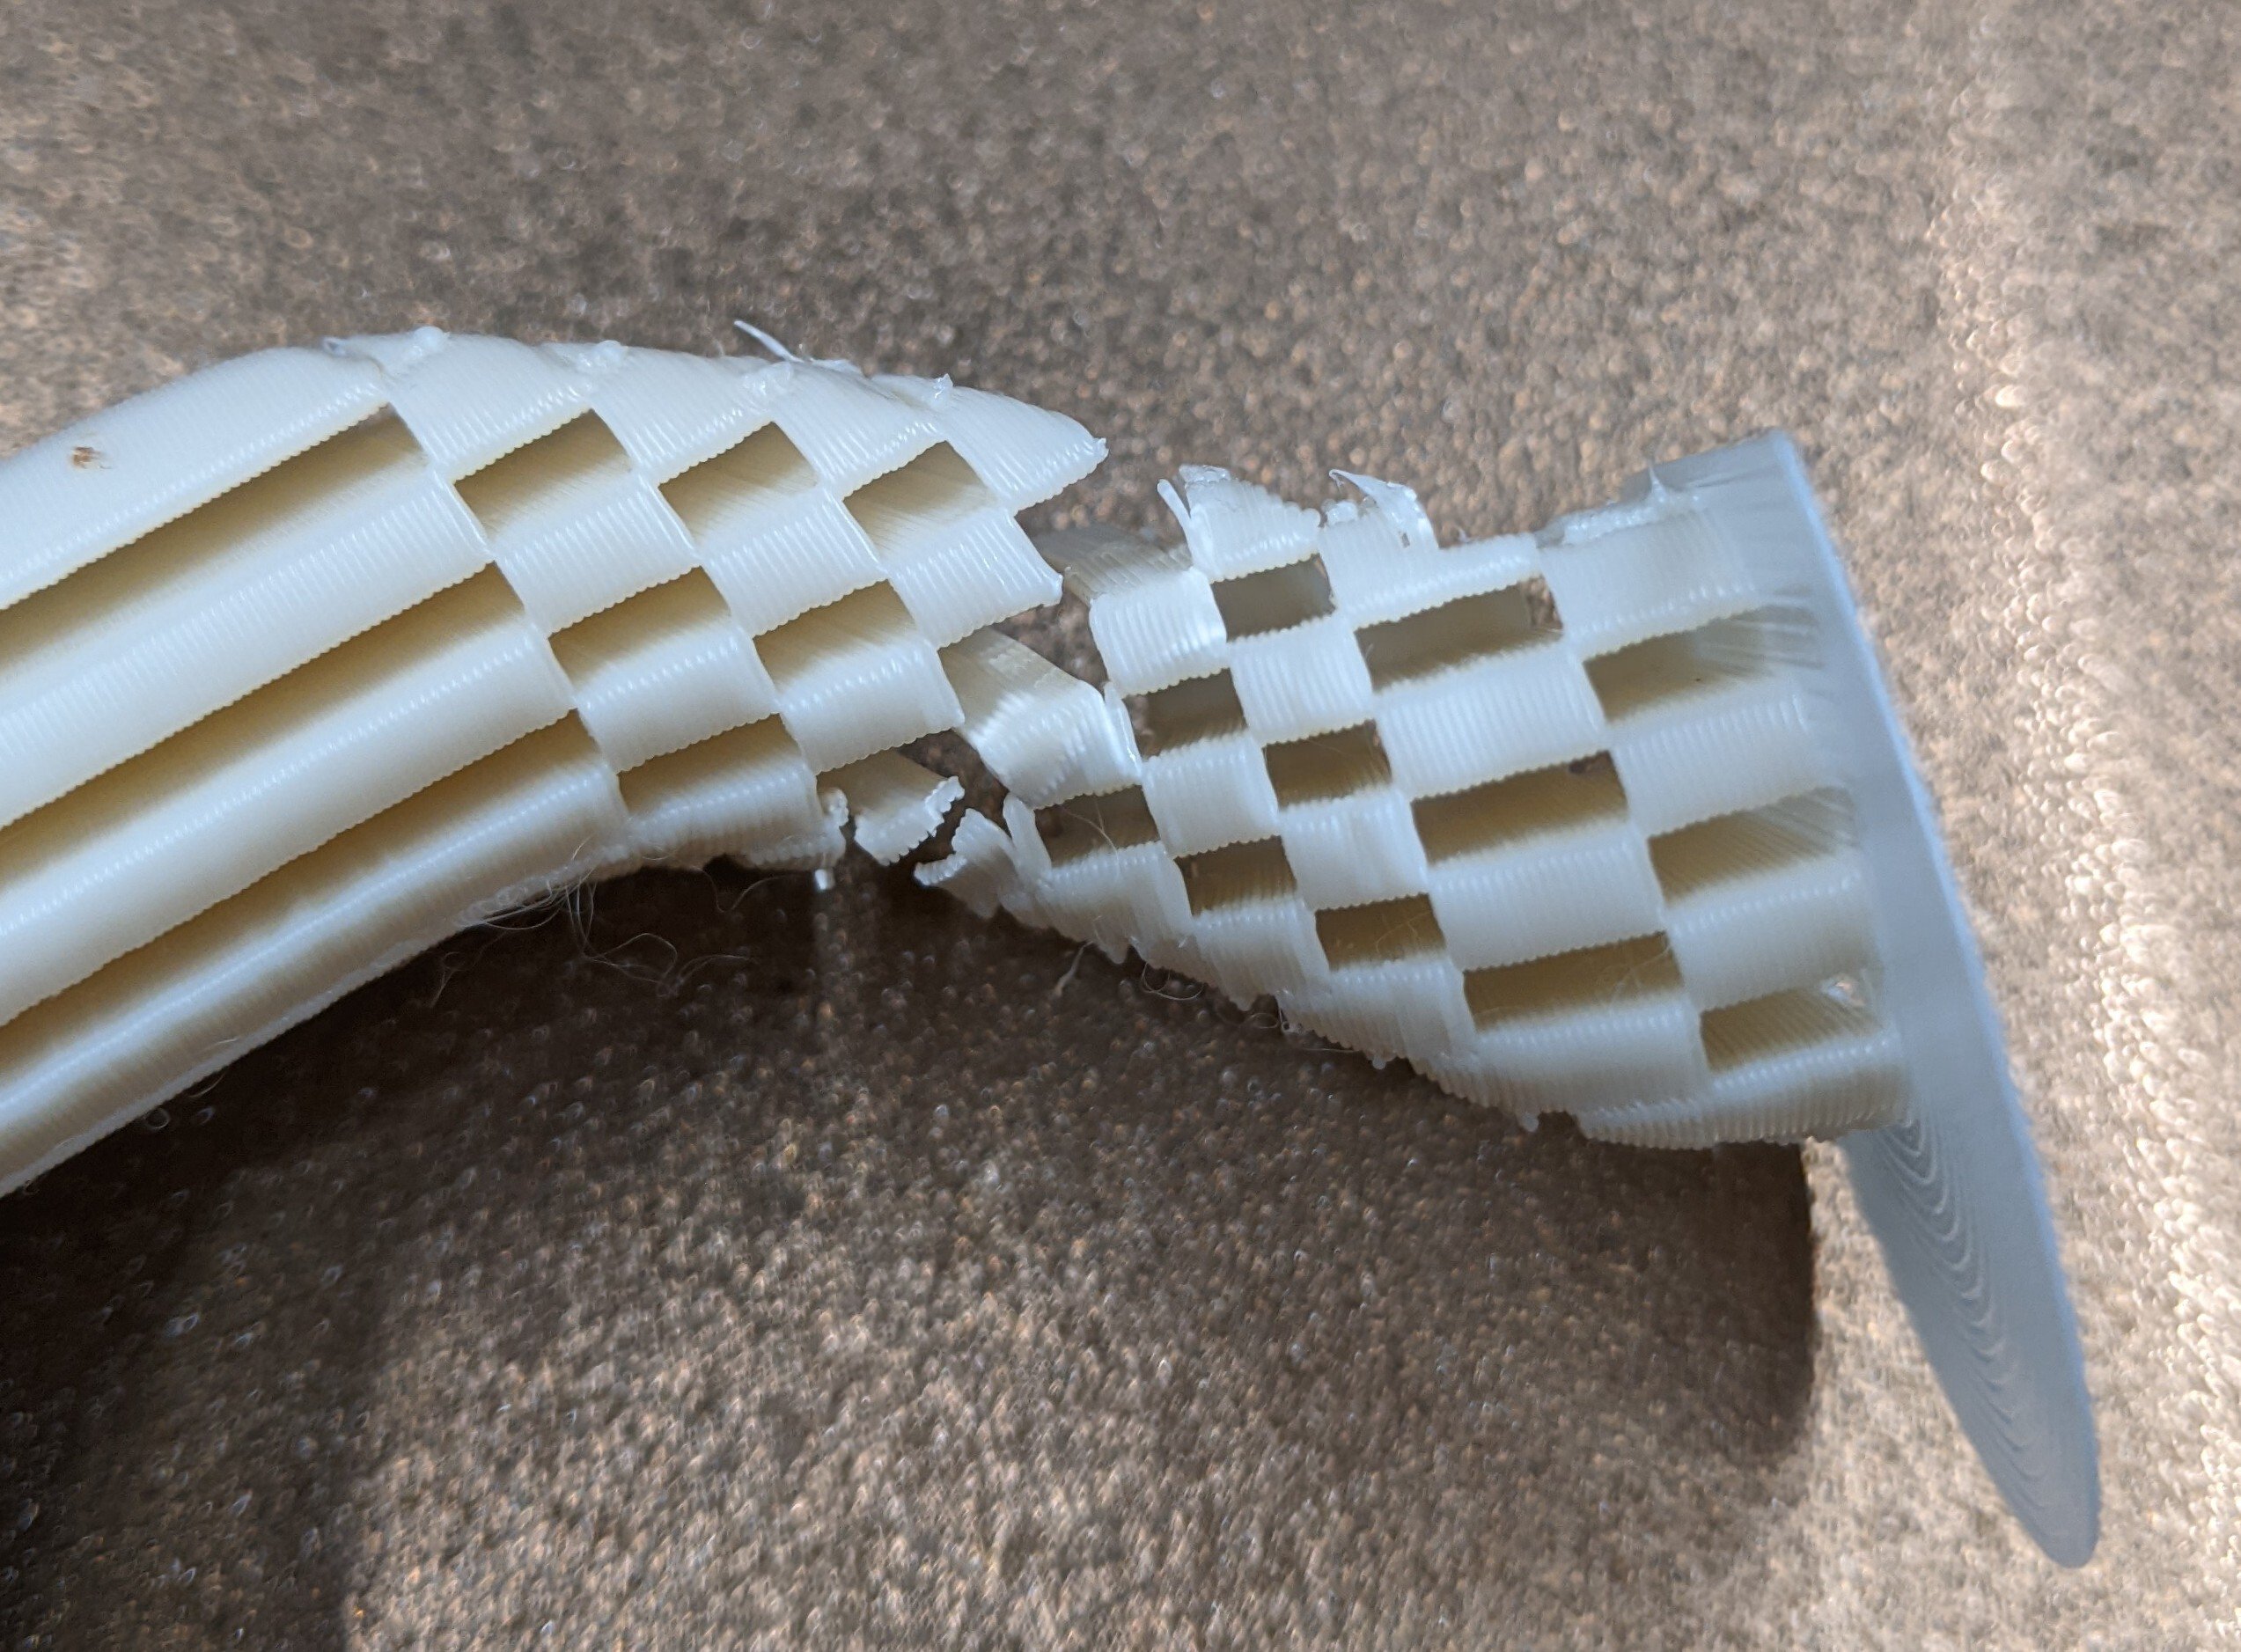
I've got a mix of good, bad, good, bad, and good again news/progress
This is a follow up from my spaghetti post a few days ago.
Good news: I caught the nozzle catching on the infill during travels. The infill must have been curling up ever so slightly. Turning z-hop on solved this. I also bumped my nozzle to 255 based on a temp tower, but I don't think my original issue was flow related.
Bad news: this brought me to the failure above - evidently my chamber temps are too low for this size of ASA part and it warped. Maybe the higher nozzle temp contributed. Maybe this size of ASA part is unrealistic despite not having sharp corners. Maybe it's the fact that it's continuous from side to side. I am still going to attempt to print a hollow cylinder to go between this piece and another similar piece in ASA, so I guess we'll find out!
Good news: the part did not let go of the build plate. I'm pretty happy about this. My first layer is not overly squished, I've never used any adhesion aids (glue stick, hair spray, ASA slurry, etc), etc. Tuning my print_start sequence is resulting in a very consistent first layer.
Bad news: the build plate came up with the print. Holding the build plate down with binder clips or the like would probably just make something else fail.
Good news: I had enough PETG in stock to use that instead. Zero warpage, so great success. I had to go a bit slower because a flow test showed that I'm limited to around 25 mm^3 for PETG before the extrude motor started misstepping, despite bumping temp to 255 °C. I limited flow to 20 mm^3 to be safe. The print's a success so meh.
Chonky nozzel + decent amount of material = opportunity for lots of spaghetti
Any suggestions before trying again after a reset? This is my first go round changing nozzle diameter. I went from a 0.4 mm nozzle to a 0.6 mm nozzle.
After the swap I checked my extrusion multiplier (no change needed) and tuned pressure advance (I had to decrease the value a bit, but it looks spot on now).
As part of the nozzle swap, I also bumped line width from 125% to 150% in Orca Slicer (should be around 0.9mm extrusion width) and increased layer height to 0.3mm. This should put me around 22 mm^3/s of material, which shouldn't be an issue for a Rapido 2 but this is the most flow I've pushed through it so far. Maybe I should bump temp a touch? I'm still at my fairly-low-for-ASA 230 that I was using with my 0.4mm nozzle.
The print didn't move on the bed and shows no signs of warpage. There also aren't any signs of curling on the areas that the nozzle must have hit to cause the layer shift.
The only thing that seems like a miss was having z lift turned off while troubleshooting a print quality issue. I had it set to only lift above 0.25mm (not on the first layer) and only lift below z 0mm (this probably disabled z-hop). Z hop when retracting is set to 0.2mm, which is less than my 0.4mm retraction length so it seems like changing the "only lift below below z" value would re-enable z-hop.